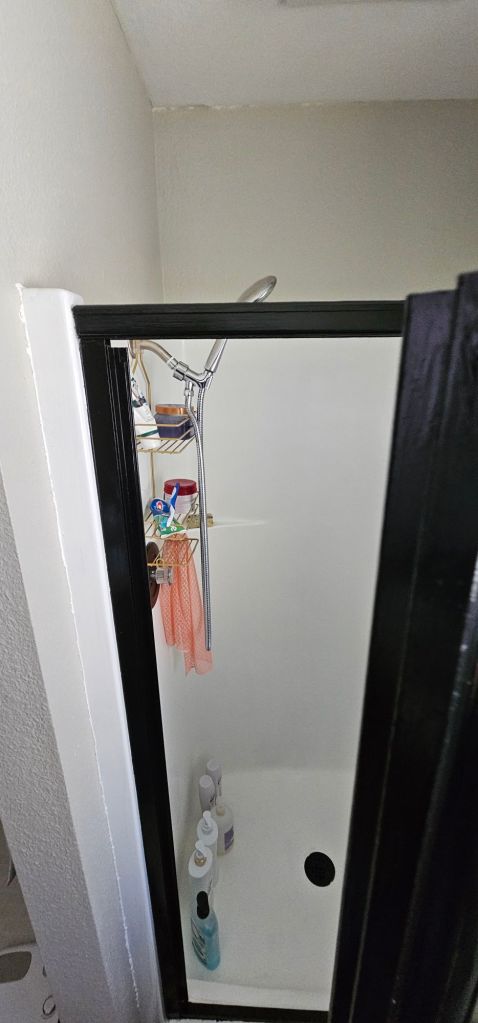
Although it doesn’t look much different on pictures, I tried to give a renewed life on worn out (smelly and turning yellowish) shower booth.
Few lessons learned-
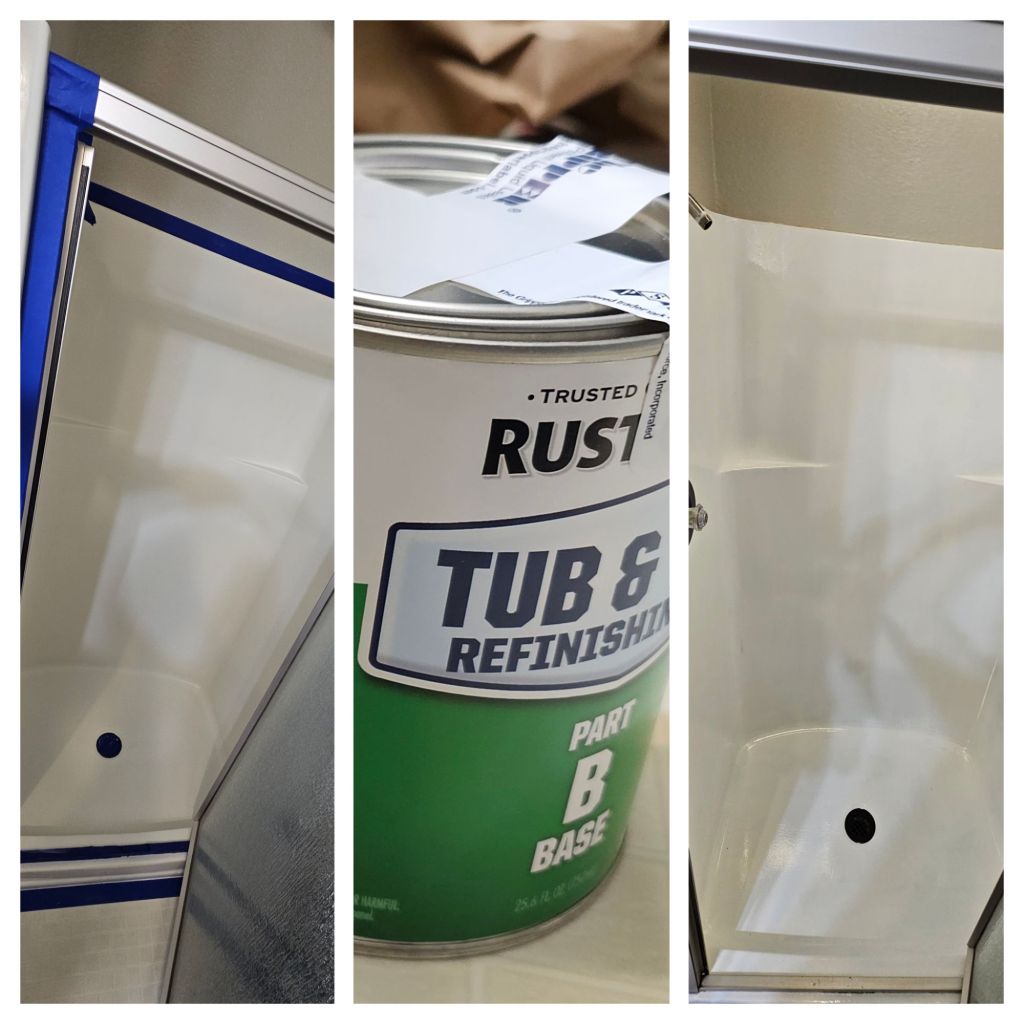
This will never work with one set of can (2 coats) for normal Joe 🙂 Anyone planning this fun activity, please be ready to buy 2 sets to be safe. (I bought an air spray and will add on top of this…)
Old wonky smell from shower booth is also generated by shower frame/door and other metal covers- replaced some old coverings but the next project for this shower booth is painting on shower booth’s frame/door
There is no “one shot and done” home repair :)…
To be continued… 🙂
지난 주말 대장님 출타를 맞이해 대장님이 주로 쓰는 샤워 부스와 누가 발리나하고 한판승부를 벌여 열심히 발라줬는데 결국은 내가 발린듯하다…ㅎㅎㅎ
Rustoleum Bath and Tub 한 set 사서 두번 열심히 발라줬건만 아직 좀 얼룩이 약간 보인다…ㅎㅎ얄팍한 상술에 내가 발렸다….ㅜ.ㅜ 이거 두 세트를 샀어야했음…. 암튼 test할겸 3차 도포는 같은 브랜드의 스프레이로 한다는 생각에 일단 끝냈다…(사실 우리집 메인 bath tub도 구조가 절실한데 그 구조를 제대로 하려고 샤워 부스를 먼저 시도한것도 있음)
샤워 부스 꼬질한 냄새는 프레임/도어에서도 나는 것 같다…이번에 50년은 되었을것 같은 커버나 뚜껑들을 새로 바꿔주긴했는데…다음에 샤워 도어도 따로 칠해 줘야겠다…
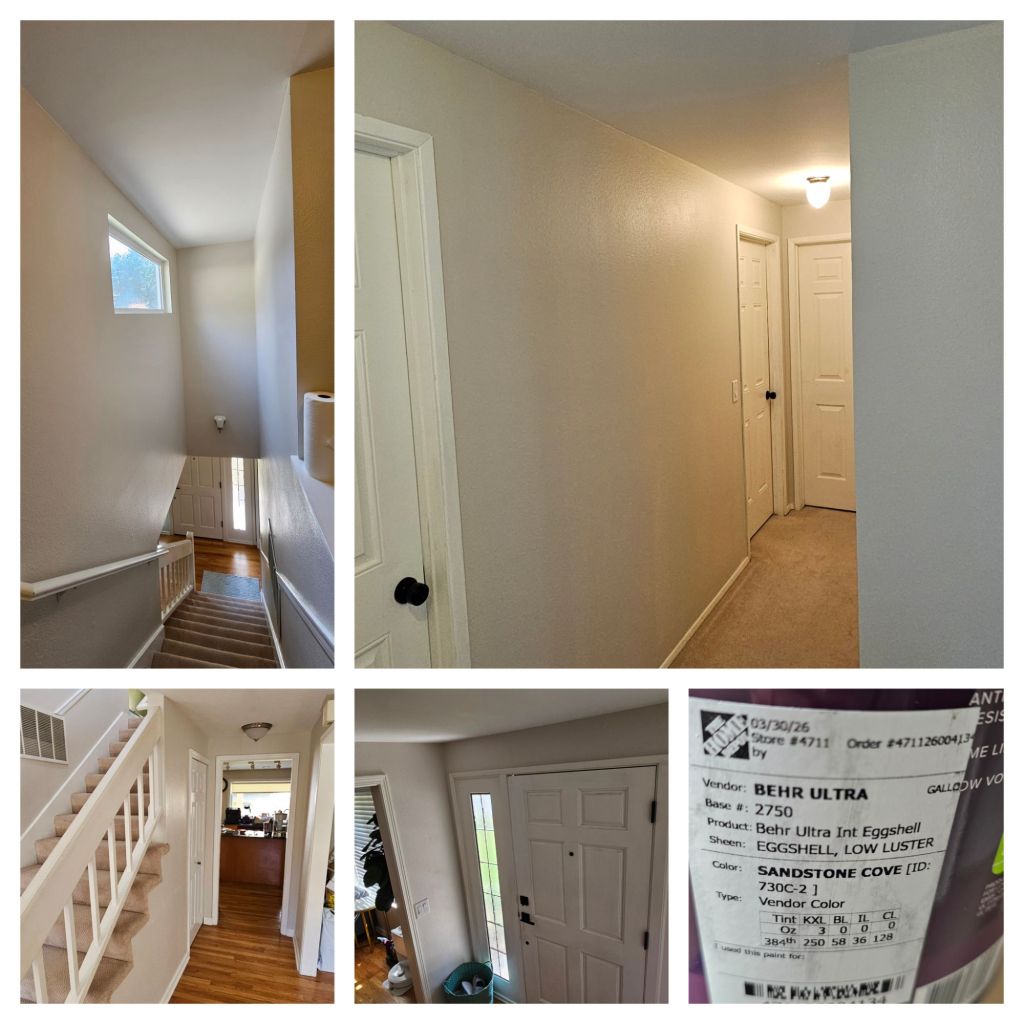
2014년 집을 사서 이사온 이후, 유일하게 Original paint로 남겨두었던 1층 문입구, 계단, 그리고 2층 마루… 사실 계단 천장에 닫는 높은 부분을 DIY로 칠할 방법이 없어 고민만하다가 집의 일부분만 너무 낡아보이는 느낌이 있어서 extension pole에 붓이랑 롤러를 끼운후….계단에 사다리 설치하고 오르락 내리락, 사다리를 비스듬히 눕혀놓고 서커스 줄타기하듯이 왔다갔다하며 높이의 공포를 이겨내며 결국 clear했다…
집 살당시에 알록달록 6개색으로 나누어 칠해져있던집…12년 동안 줄이고 줄여서 드디어 2개로 통일…
다만 삽질을 하게 된건 옛날에 남은 페인트 한 통을 칠하던중 1층을 초도 도색 후 새로 페인트를 사야하는 상황이 발생했다..
근데 페인트의 기본 베이스가 단종/변경 되는 바람에 똑같이 색을 맞춰도 새 페인트가 밝게 되어 되어 결국 1층도 다시 새페인트로 칠해야하는 삽질 참사…
아무튼 10년넘게 쌓여있던 마음의 빚 하나 해치웠다…
Finally repainted last piece of original paint left since I bought this house like 12 years ago..:) This required overcoming height phobia with ladder due to open space from the stairs.
Now finally reduced the colors of the interior walls in this house from originally 6 to 2…yes this was a house with daughters only 🙂
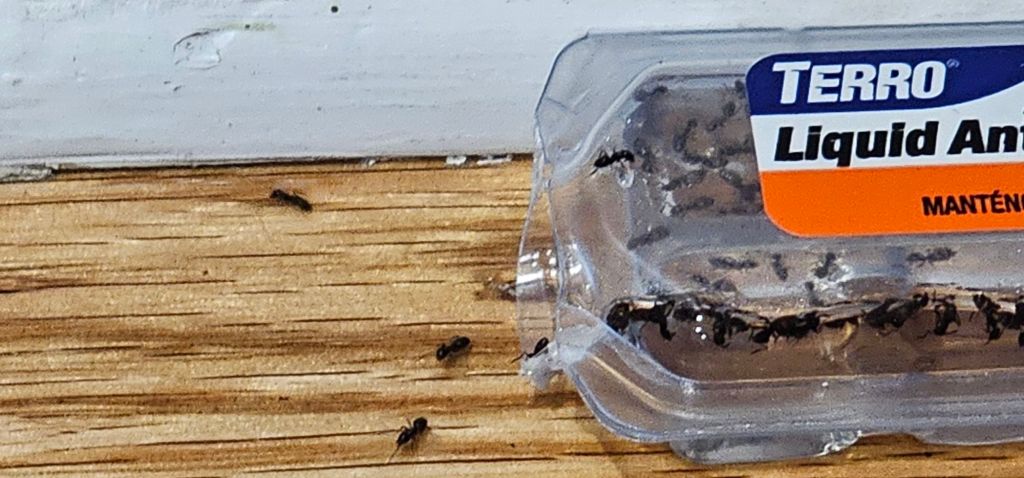
집 티비쪽에서 좁쌀처럼 작은 개미들이 하루에 하나둘씩 출현해주셔서 Raid 개미 잡은걸 설치했는데도 1도 관심이 없었다… 혹시나하고 Terro Liquid Ant Bait를 놓고 이건 되려나 하고 첫날밤에 봤더니 충격적인 양의 개미들이 저쪽 furnace쪽에서 줄지어 지옥으로 탐방을 나오셨다…뜨아…
결국 처음 이틀간 대략 100에서 200마리 가량이 방문한듯하고…(대충 지옥의 맛에 빠진 개미만 대충 50에서 100일듯…) 설명서대로 잡고 싶은 충동을 참으며 지옥의 맛을 전파에 영향을 준다나…냅뒀더니 거짓말처럼 설명서대로 이틀후엔 절멸 수준으로 개미들이 다 사라져주셨다…
After noticing very tiny ants around TV at every night, decided to test out the baits and saw shocking results…all gone in 2 days with maybe 50x or more captured vs seen per day…
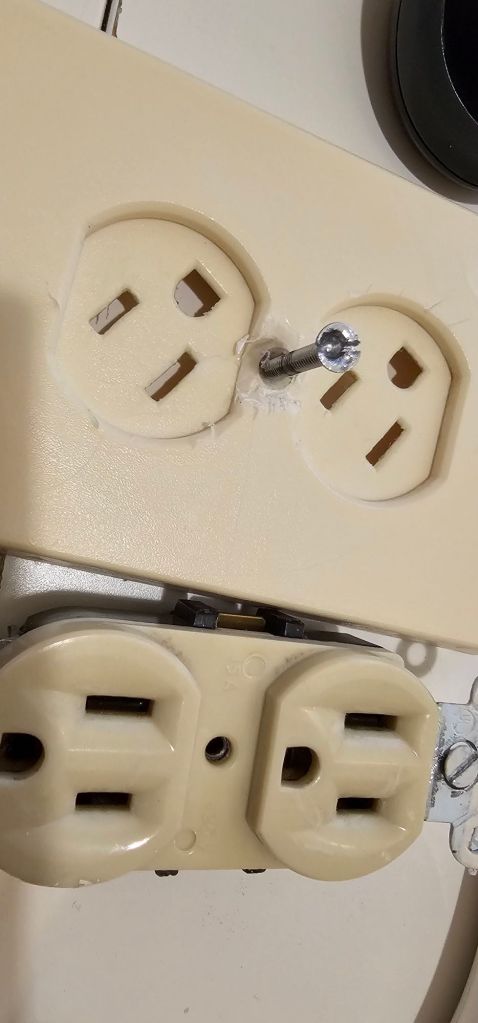
나사가 깨지고 말않들어서 교체하지 못했던 마지막 OG 아웃렛….이 outlet은 심지어 cover로 어린이 protection까지 결려있는 철통 방어로 어려웠고 screw가 망가져 쉽게 뽑히지도 않아서 몇번 포기했다가 결국 주위를 깍아내고 우격다짐으로 돌려내서 종국엔 뜯어낼수 있었다…그동안 수고 많았다ㅎㅎㅎ
Finally was able to change the last remaining outlet which might have been inherited from original build of this house 🙂
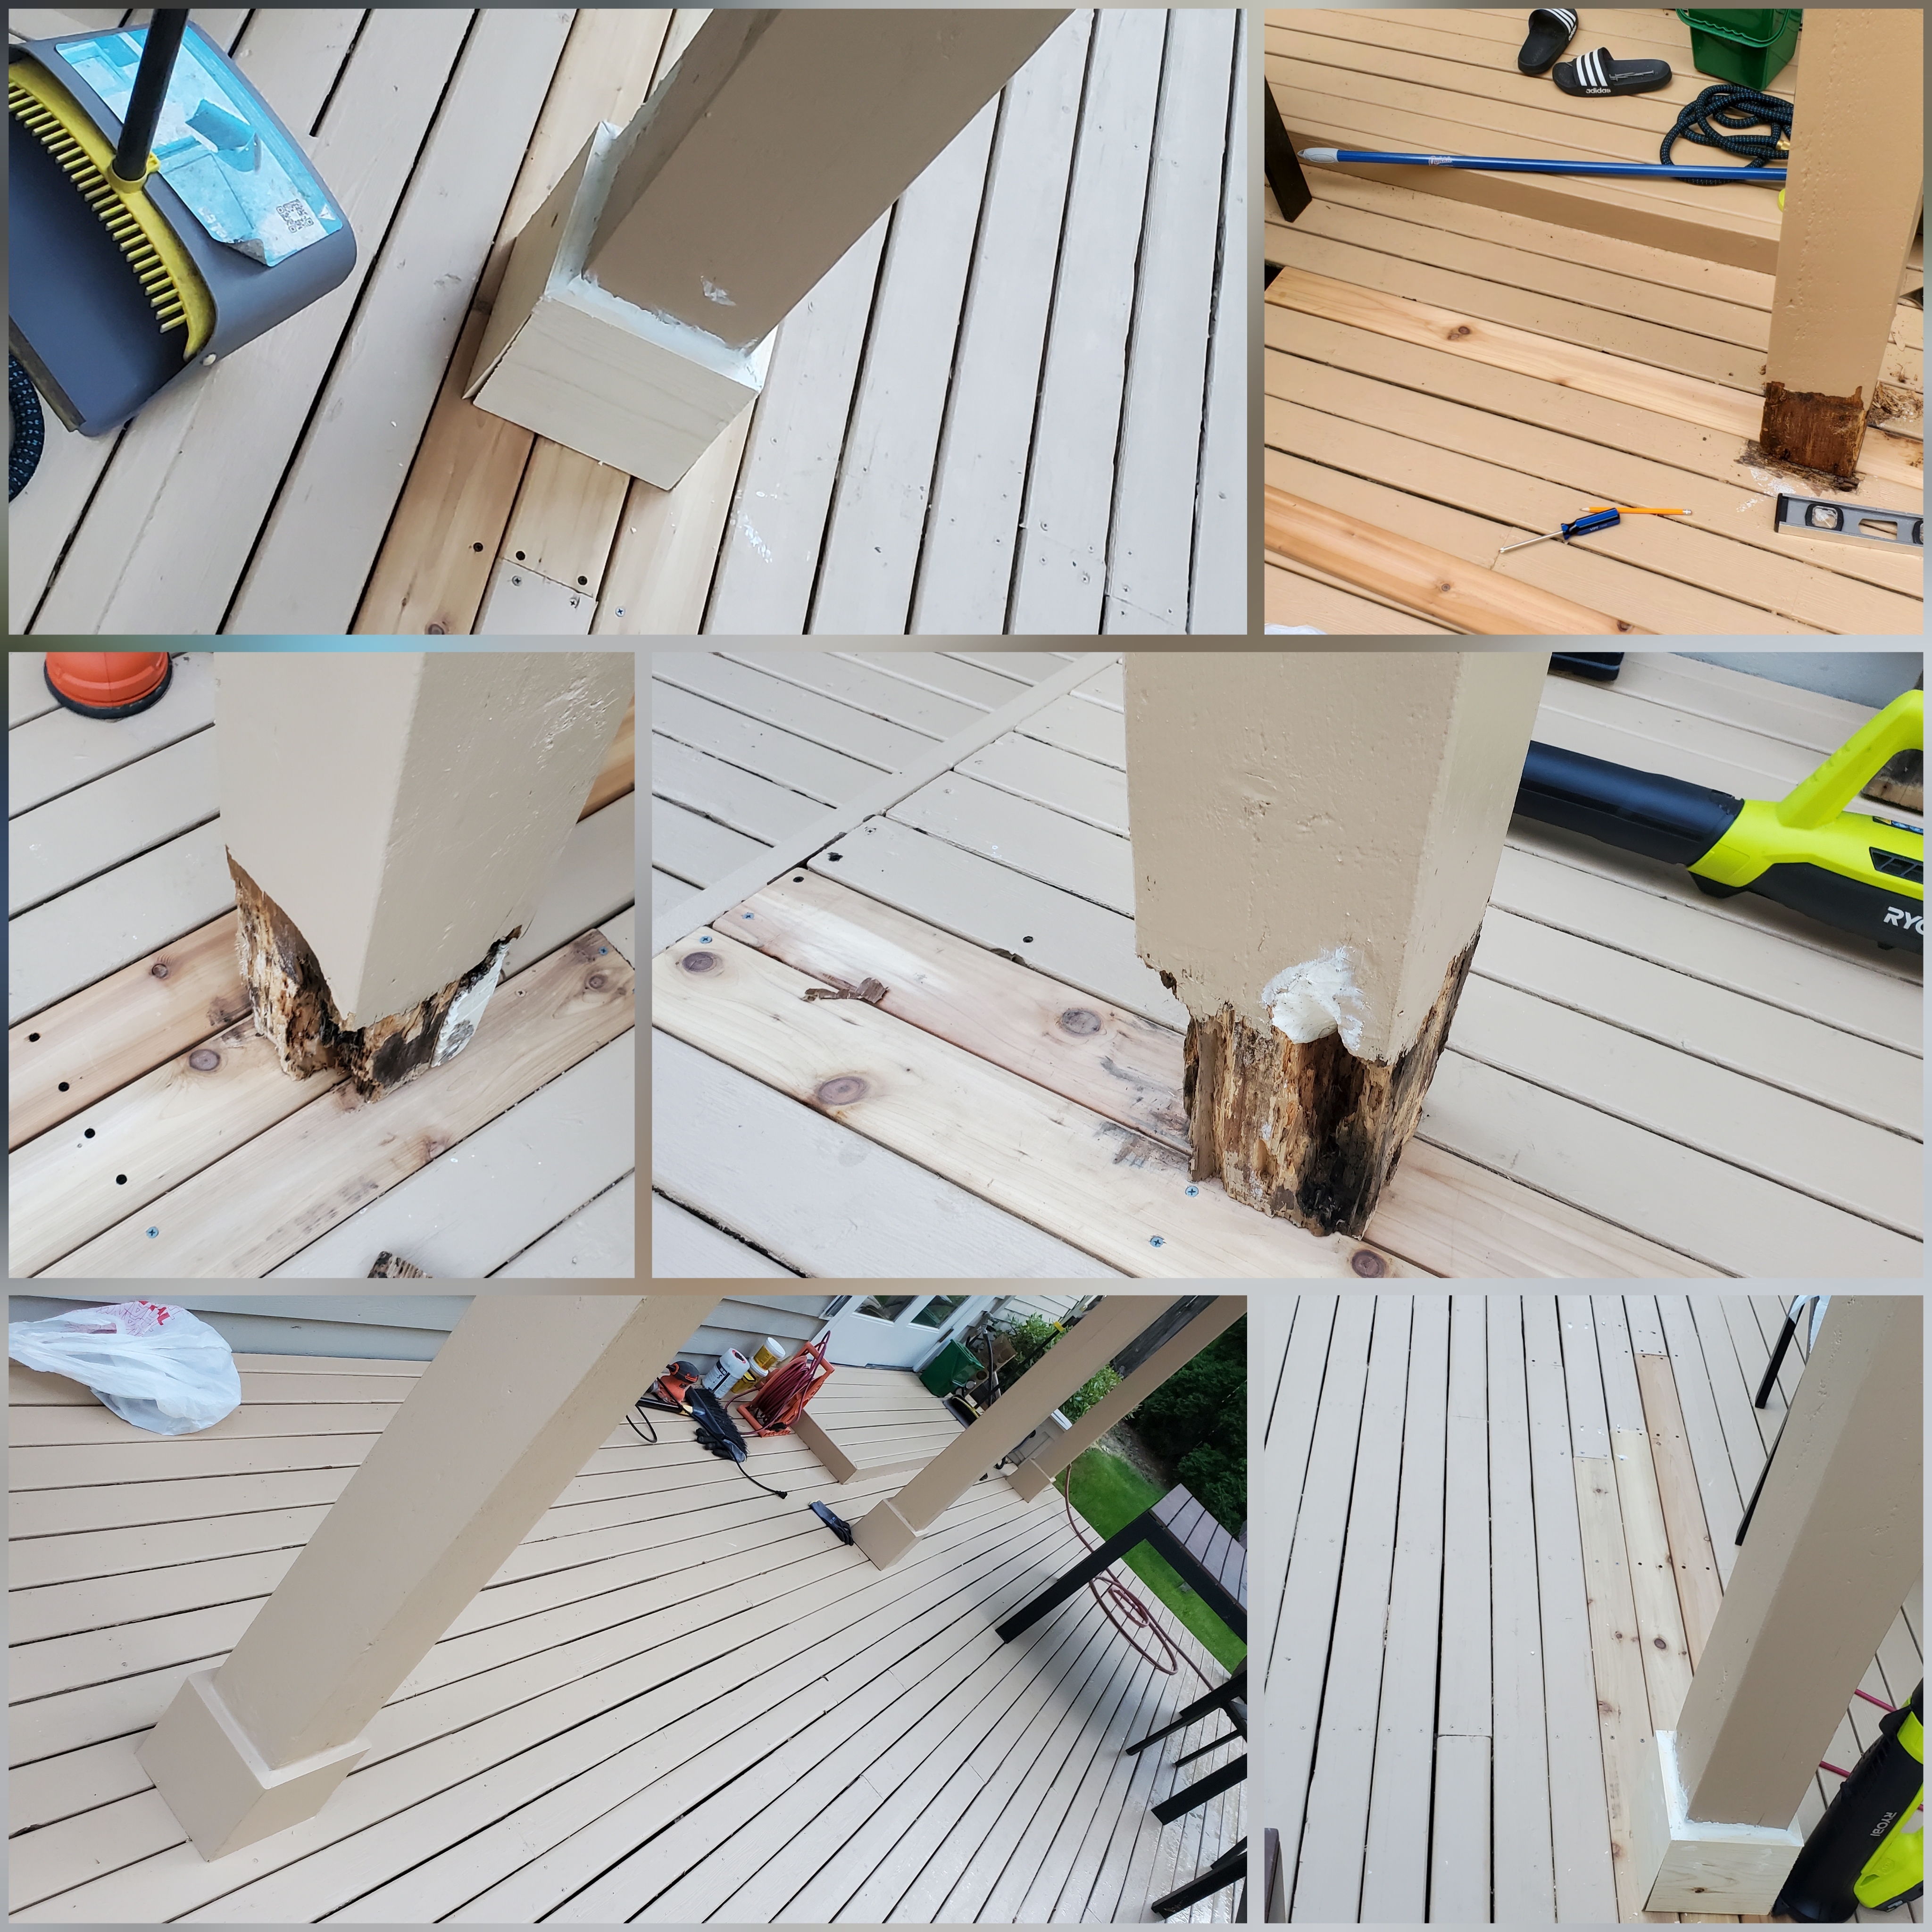
Part3로 끝을 내고 마무리 하려했는데… 자세히 살펴보니 Post 밑의 deck board가 썩어가고 water damage도 입은 채로 있어 좀만 sharp한걸로 쑤시면 구멍이 숭숭 뚤릴 정도로 약해져 가고 있었다.. 더불어 post를 감싸고 있는 발싸개 moulding 나무들도 다 썩어 문드러 지고 심지어는 post하단부가 많이 썩어들어가 있는 형국….. 결국 올해 이 board들을 교체하지 않으면 내년 여름까지 아마도 대재앙의 확률이 일어날 듯 보여서 고심 좀 하다가 뭐 우기에 무너지는 대재앙 보다는 무너진다면 차라리 지금 고치다 무너지는 게 차라리 better란 생각에 risk감수하며 눈물을 머금고 Part4진행…
결국 포스트 기둥 밑의 board를 교체하고 post 밑부분 중 썩은 부분을 도려내고 보강한 후 post 하단부 moulding을 세 개 모두 교체하기로 결정하고 다시 Lowes로 뛰어가 나무 사오고 온갖 도구들을 다시 deck으로 소환 노가다를 시작했다..
이를 최초로 시공한 -전주인으로 추정…- 사람이 무슨 사연인지 post를 deck위에 올려놓은 (뭔 이유가 있을 듯…) 관계로 post밑단의 board교체를 위해선 post를 deck에서 분리하고 -post 전체를 해체할 순 없으니…- post의 썩은 부분을 긁어낸 이후 post의 하중을 느끼면서 조금씩 밀고 땅기고 한후 공간 확보 후 썩어가는 board를 뜯어 내고 새보드를 밀어 넣고 고무 망치로 냅다 두들겨 위치를 맞춘 후 다시 Post의 수평 수직 맞추는 나름 머리와 느낌도 좀 써야 하는 작업을 계속 진행했다….
Post의 기존 moulding은 아무리 찾아봐도 수제로 제작한 듯 보여 결국 비슷한 나무를 사와 처음으로 45도 cut을 해서 대충 맞추고 (라고 쓰지만 대충 맞추고 nailer로 무식하게 쏴서 post에 고정시켜주시고..ㅎㅎ) 물이 비집고 갈 틈은 wood filler로 매꾸는 삽질… 그리고 이젠 진짜 마지막을 외치며 새로 교체한 부분에 다시 한번 stain칠을 발라 주셨다…
이젠 진짜 앞으로 2-3년은 혹 썩어서 교체해줘야 하는 piece가 발생하는 게 아니라면 무탈할 듯 하다…
This series has been a zombi story 🙂 – always new issues popped up as I was hoping to finish this project. This time it was the deck boards under the post, lower end of post, and mouldings of the posts.
This was another tough series of tasks as it required some physics as it required some estimation of which part of healthy post carries the load and wiggling of the post to find the room to pull out rotten boards and insert new boards and re-adjust the post’s location to spread the loads to newly installed boards.
Plus – this required me to run 45 degree cut on making manual post moulding which was fun! 🙂
뒷마당 deck나무들이 장열하는 직사광선과 습윤한 비와 습기로 인해 썩어가고 있었다…멀쩡한부분까지 긁어내다보니 더이상 filler로 repair할수 있는 영역을 초과하여 치과에서 crown씌우듯 직각으로 긁어낸후 도려낸부분 만큼 잘라 본드로 붙여주고 그래도 있는 gap들은 wood filler로 매뀌주시고 sand한판 delivery햐주셨다…
이번 repaur로 또 5년은 버텨주시길빈다….
역시 목재의 적은 직사광선과 물이다…
The thing kills wood is direct sunlight and rain and repeat of those two… 😦