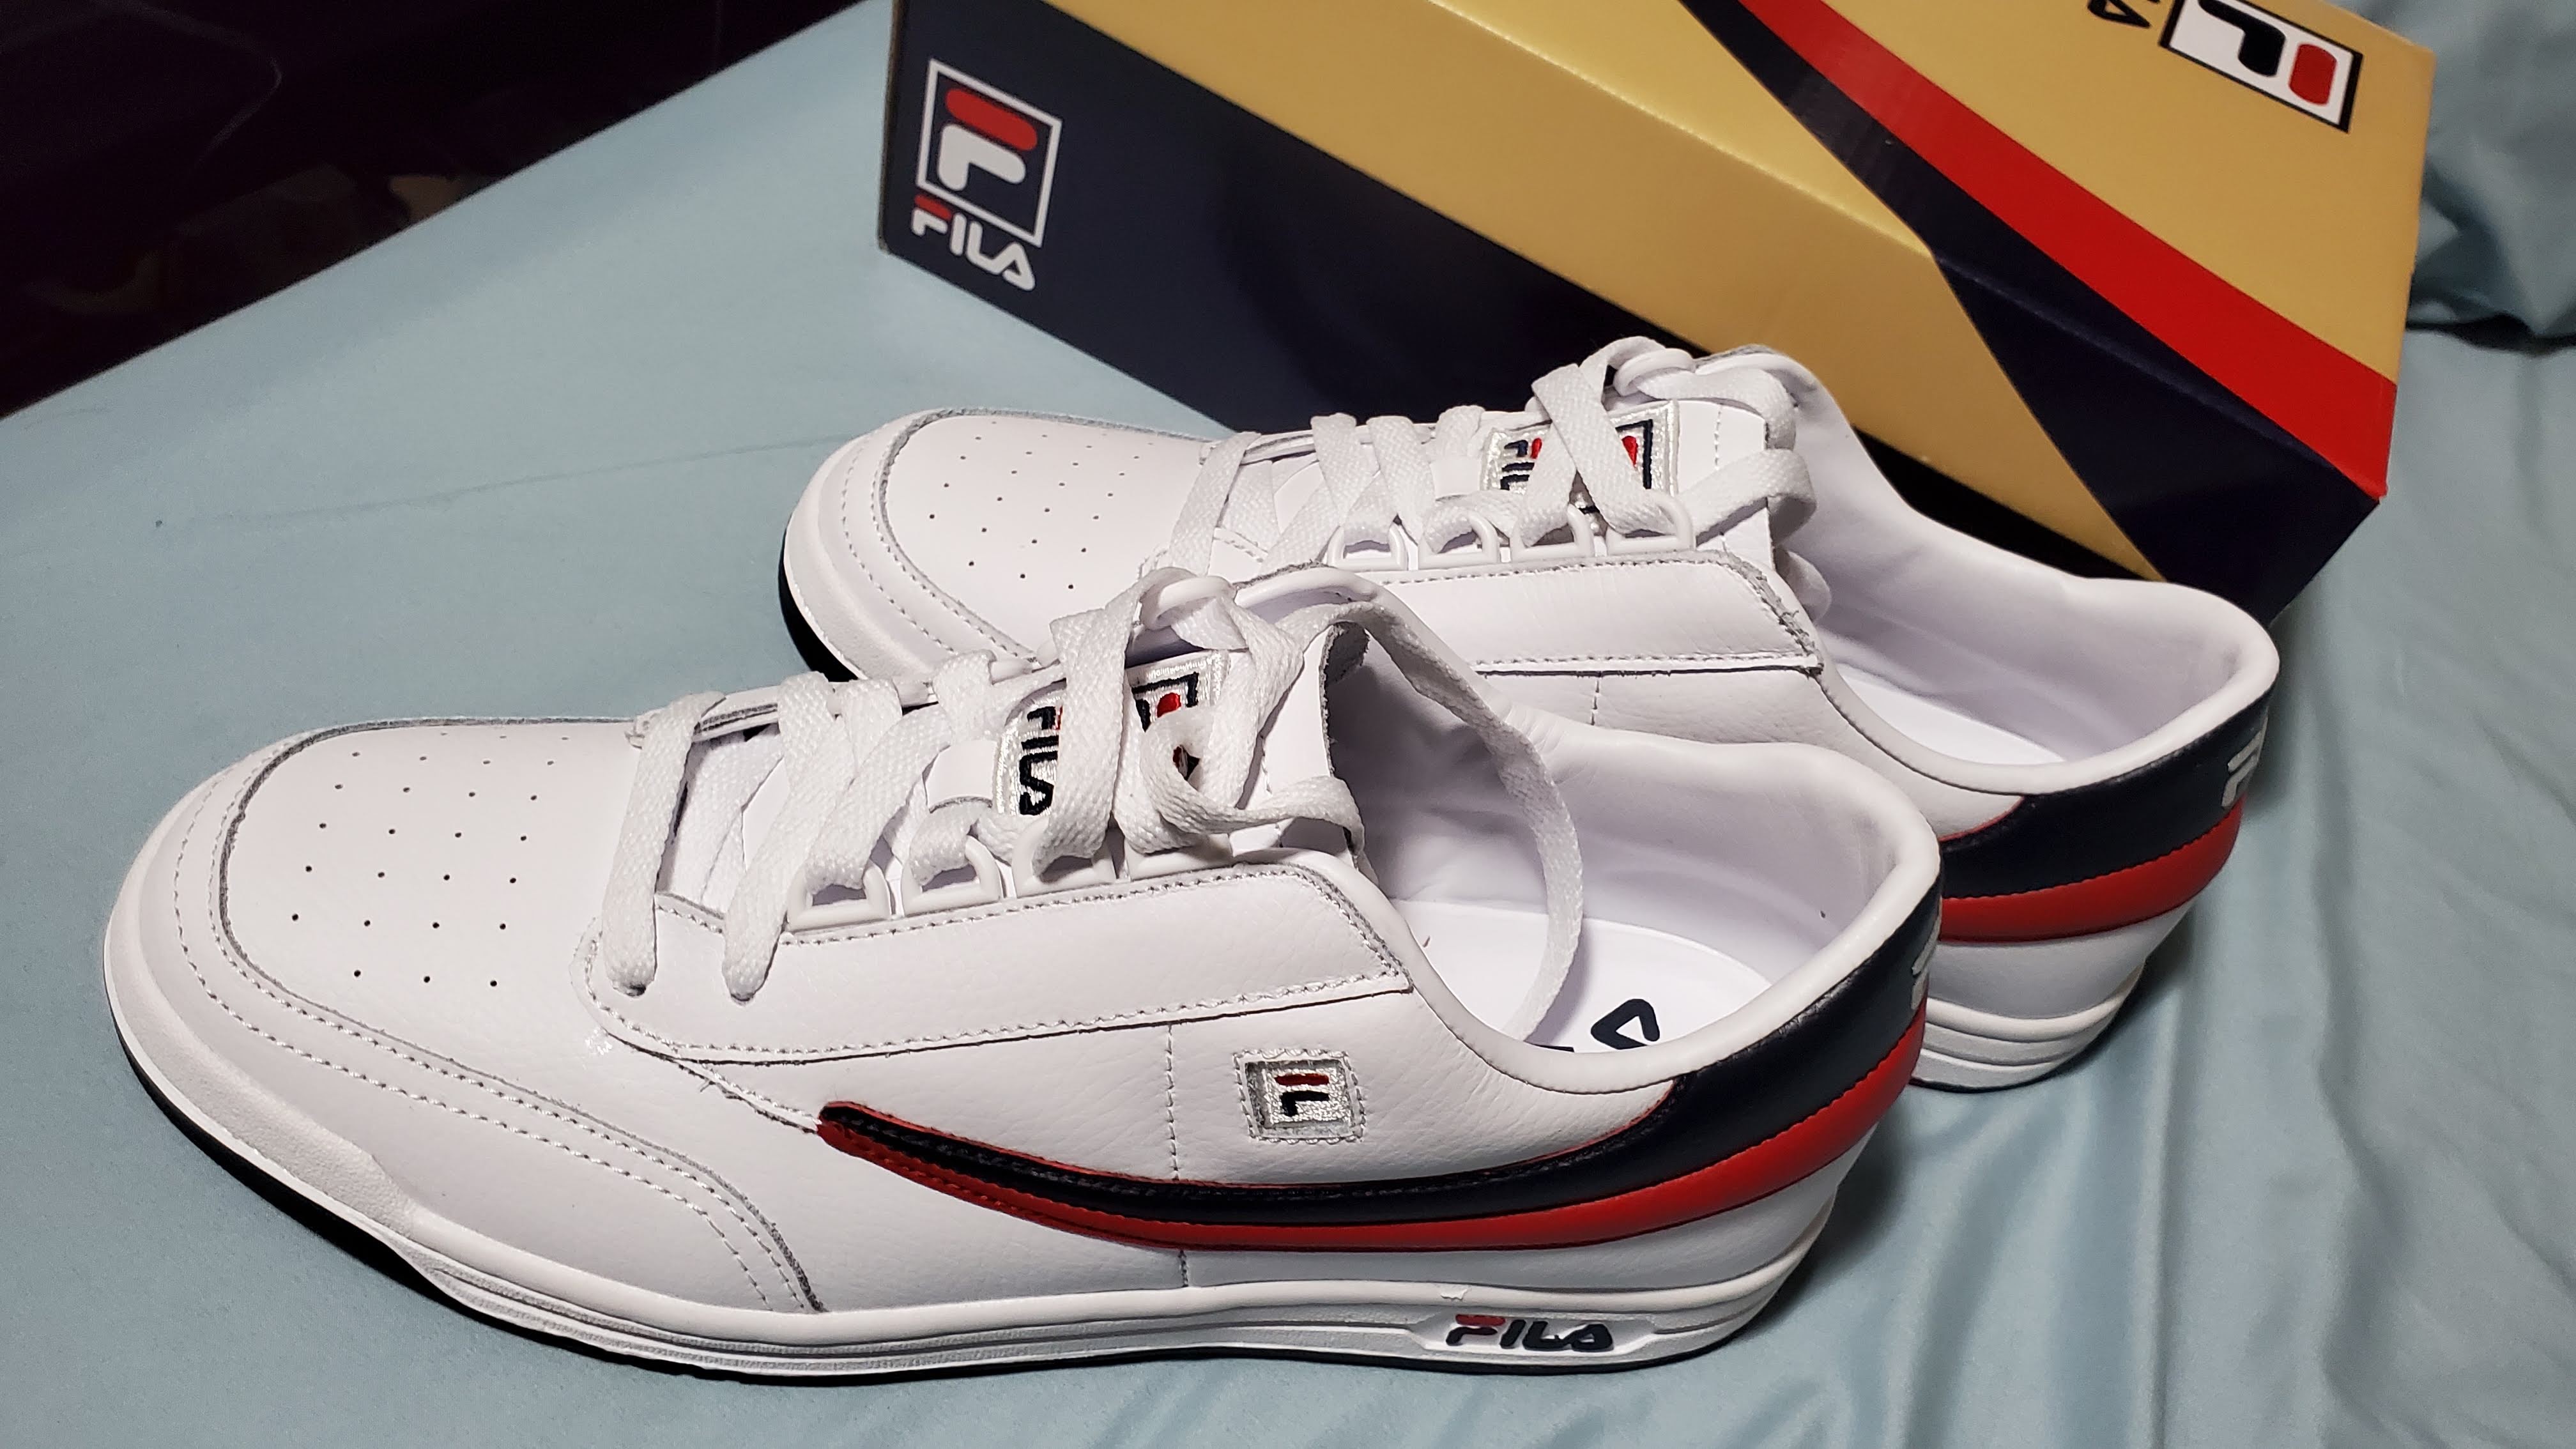
테니스화를 사려다 이걸 사고 말았다..ㅎㅎㅎ 어쩐지… 테니스화 치고는 가격이 좀 싸긴 하네라고 생각했는데 테니스 전문화라기 보다는 옛날 테니스화의 디자인을 채용한 평범한 신발….ㅎㅎ 뭐 테니스 치기엔 나쁘지는 않을듯 싶으니 당분간은 테니스칠때 신다가 그냥 신고 다녀도 될듯하다..ㅎㅎ
한 때 거의 모든 동네의 학생들이 농구화를 끌고 다니던 시절… (이 시절 이 황당한 유행의 불은 -들어는 봤나 기억은 하나- LA Gear라고 끈 두줄로 묶은 농구화가 붙였고 곧 Nike 나 Reebok이 날라다니던 시절… 다들 농구화의 무거움/묵직함을 길에서 일부러 끌리는 소리로 내며 가오잡던 말도 안되게 웃긴 시절…) 돈 모아서 이태원에서 사서 신은 농구화가 이태리 브랜드로 나름 엣지 있었던 Fila였는데 당최 왜 Fila였을까? – 물론 어차피 Nike나 이런거 비싼 신발을 사기는 부담스러우니 (돈많으면 왜 구지 이태원을 갔으랴…ㅎㅎ) 차라리 아무도 흔히 신지 않는거라고도 사자는 심정으로 사고 만족했던 기억.. ㅎㅎㅎ
거의 30년만에 사주신 Fila가 되주셨다. 서울에서 농구화를 갖고 싶던 꼬맹이 중2병 환자는 시애틀에서 막내가 중2인 아저씨가 되었고, 이태리 브랜드라 나름 엣지있다고 생각했던 Fila는 사실상 한국회사가 되어 이 아저씨는 이걸 사며 나름 애국하는 마음으로 샀다고 생각하게 해준다..ㅎㅎ
Fila shoe -the last Fila shoe I had was when I was a wild teenager 🙂
Actually, part of the reason went thru the journey of DIYing was also because of this drill – Installing Trailer Hitch. Again, did the huge amount of search the web and youtube video to know what hitch fits odyssey, how to install, and ordered the ramp, hitch at Amazon and tried to install it.
As usual, everything was smooth in YouTube, while there are so many dumb challenges at my end. All the video suggested me doing with 2 or more people, but I don’t have that luxury – no one in my house can help – so brought out home various size of boxes and used those to balance and attached one hole after another hole. Also, used Ratchet Socket Wrench to installed it but it only went into few rounds and half tightened. 😦
So used my own ‘impact’ drill with socket but no luck -it was so weak only to make few more twists/advances, then learned that I need Impact Wrench 😦
As it was already evening, I had to leave the hitch as ‘not to fall off’ level and Amazoned overnight delivery 🙂 – This must be the Copang experience I hardly ever had 🙂 and magically package arrived at next day morning 6AM.
However, when Impact Wrench arrived tried to use the Ratchet socket but learned this doesn’t fit Impact Wrench and actually it is not recommended to be used with Impact Wrench anyhow 😦 haha – so had to order another long Impact Socket set for Impact Wrench with same day delivery – ha 🙂
Finally, all the bolt and nuts are 100% tightened – so wondered a bit on setting the Torque but as the car is old and I suspected some of miss-treading is there during install, thought this is good enough for me 🙂
At the end dirty hands with some scratches, series of Amazon orders, and crazy searches on YouTube and Bing (Yes I work for Microsoft haha) mission complished ~80%: Now I need to unbox and install the ordered bike rack 🙂
2021.5
또 한편의 눈물겨운 DIY 사투… 사실 지난번에 차밑으로 누워서 기어들어간건 Ramp가 있었기 때문이고, Ramp를 주문한 이유는 사실 미니밴에 자전거를 실어 다닐 트레일러 연결 축을 설치하기 위해서였다.. 도데체 배꼽이 몇개이며 얼마나 큰건지…ㅎㅎ (이놈의 자전거란..문제는 자전거는 아직 사지도 않았음…있던 자전거는 이사하면서 대충 정리 다 했건만..)
사실 이러면서 많이 배우기도 했으니 쩝.. 차에 트레일러 연결축은 구멍뚫고 해야하는 줄 알았는데 차마다 밑에 나사 박아주는 장치가 있다는 것도 이번 여정을 오기전까진 잘 모르고 있었음..ㅎㅎ
암튼, 웹서치와 함께 유투브 동영상을 열공하고… 차에 맞는 녀석으로 주문하고 (아 되게 무거움..T.T) 비디오에선 항상 쉽게 되는걸 시작했지만 언제나 그렇듯 나에겐 절대 그럴리 없다..
일단 둘이상이 같이 하라고 하는데 우리집 식구중에 도와줄 사람이 당연히 없으니 그걸 구지 혼자 빡스들 이것저것 꺼내와 수평 받혀가면서 나사 하나씩 끼울 높이 맞추고, 집에 있는 깔깔이 렌치로 하면 되겠군 했던건 한 4-5미리 들어가더니 더이상 뻑뻑해서 진척이 없음..결국 첫날은 4-5미리만 끼운채 마쳤다.. (테스트해본 결과 엄청 덜컹 거림…ㅎㅎ)
결국 다시 찾아보니 깔깔이는 약해서 안되고 임펙트를 써야한다길래 집에 있는 임팩트 드릴에 렌치 소켓 끼워서 해보았으니 결국 임팩트 렌치+임팩트용 길쭉이 소켓을 써야한다고 결론을 내리고 뒤늦게 두개를 부랴부랴 주문했다.. (신기한건 임팩트 렌치는 Amazon overnight으로 주문했는데 설마 했는데 진짜 다음날 아침 6시에 집에 도착한 신기한 체험-서울에선 쿠팡때문에 이게 아주 일상일텐데….) + 사실 낄쭉이 소켓도 임팩트 렌치에 있던 깔깔이 소켓 끼워보려했더니 안되고 그렇게 하면 소켓만 깨지고 안될거라고 해서…T_T (으아) 당일 배송으로 주문… – 역시 신기한 당일 배송 체험…
결국 – 모든게 도착한 후- 반쯤 끼어 덜컹거리던 축 끝까지 눌러서 고정시켜주셨다..ㅠ.ㅠ
하 이제는 이 축에 자전거를 달 rack 설치만 남았다… (자전거도 사야함…흑… OTL) 마치 살 차도 없는데 혼자 길딱고 지하주차장 파는 기분…
항상 여느때와 같이 검색엔진 광고 수익 많이 내주고 유투브 트래픽및 광고 수입에 기여해주고 아마존 수익에 지대한 공헌+ 기름먼지때 묻고 여기저기 긁힌 내 똥손에 넋나간 내 얼굴만 남았다…
이걸 사람 써서 하면 대충 300-500불 나온다는데 결국 축값 130불 +임팩트 렌치&소켓 100불 Ramp는 차고칠때도 썼으니 반띵했다 치면 20불.. 뭐 대충 당장 200불 가량 절약했다 맘편하게 생각하기로 했고 뭐 살다보면 임팩트 렌치 분명 쓸일 생길꺼다… (옛날에 펜스 문 수리할때 이거 있었음 편하게 했으련만 이란 생각도..)
암튼 설명서나 비디오에 나오는거 100% 고대로 하지는 못하고 대충 90% 정도 대충 얼기설기로 다 했으니 다음에 이거 할사람 연락주시라… 훨씬 쉽게 더 완벽하게 도와드리겠삼…ㅎㅎㅎ
Since very end of last trip to Redwoods National Park/Oregon Coast, I felt some metal is clicking when vehicle’s speed is increased, but immediately disappear after the speed is up and more painfully irregularly.
So much of our freak-o-meter went up, the unlimited search on youtube was on. Metal Noise (when speed is up), Metal scratching when speed is increasted etc.. , then every different ones were suggesting break pad problem, transmission problem etc,.
Data science kicked in with extremely mental hypothesis testing ‘Does it make noise when it is uphill or downhill’, ‘Does it make noise when road surface is not bumpy or not’, then one great clue I landed was ‘It always sounds at 20MPH -40MPH. However, that theory was broken when I was testing on freeway it made a noise again around 60 MPH as well. Ah…
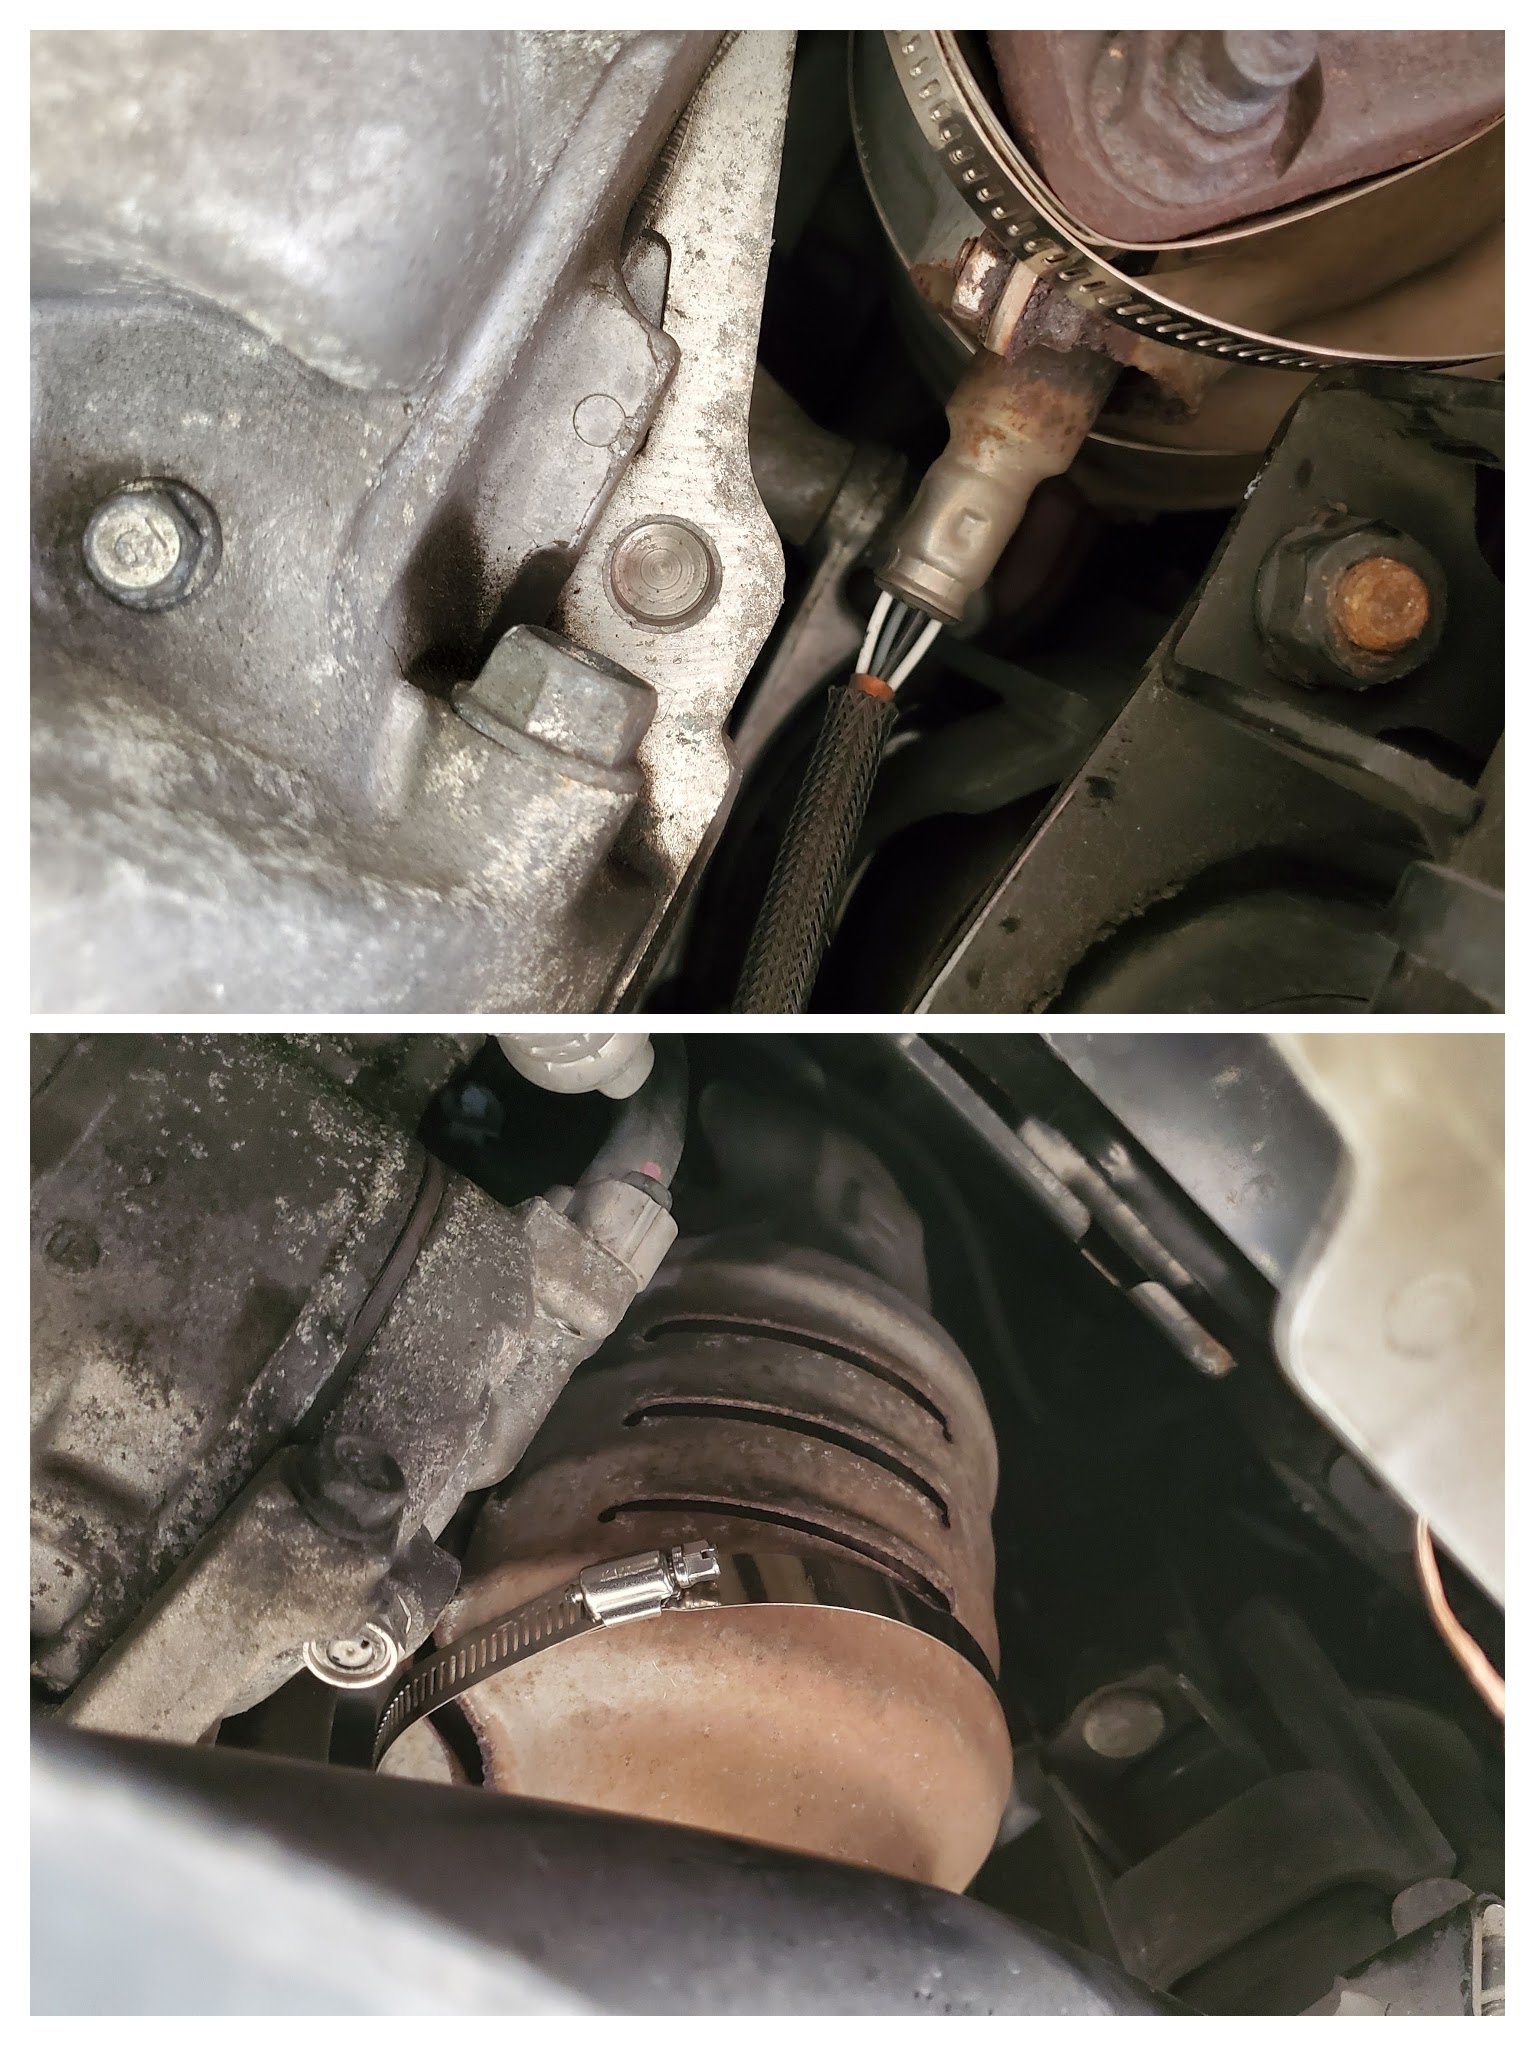
At the end of lengthy period of hypothesis testing, came to conclusion this mostly happens when RPM is passing thru 2,000-2,500 and less in the morning; especially when engine works one more step. Then I searched the web and youtube to learn this is more likely the problem of heat reflection metals around the exhaust system getting aging and loose and the vibration from the engine is making it “rattle” – glad it was not a break nor transmission problem 🙂
Went to auto repair shop, and the mechanic simply screwed in one screw piece in the gap at the surrounding cover parts near the engine (Catalyst) and it was fine. His suggestion was using this as molding is the ultimate solution but it will be costly and time consuming 🙂
However, that patch didn’t last long, and about a week later started to hear the rattling again. So decided to go more permanent solution.
So crazy DIY kicked in –
Ordered a ‘ramp’ as I don’t have the jack (and I have been in the need of something to put my car up for other reasons)
Looked at the area where the screw-patch was on – clearly gone 😦
So followed one of the videos suggesting using the metal clamp to hold the covering tight – some suggested zips but clearly got to know that won’t last at here as it was extremely hot with simple driving.
At the end, when the ramp and metal round clamp arrived, put the car on the ramp, dig thru under the car (first time using the back to move around after highschool’s military training class) put two clamps with painful arms with the hope at least one will resolve.
At the end – perfect solution. The rattle is gone now, (although hurt my eyes as particle dust from the car hit my right eye; continuously pumping tears for few hours. (+ countless attempt to wash out with tons of water :))
오디세이가 지난 여행 말미에 시애틀 다와서 좀 밟아주면 뜨르르르 드르링거리기 시작하다가 바로 잠잠해지는 소음을 내기 시작해주셨다.. 아 쒸…이거 브레이크패드 소리는 아닌데 트랜스 미션이 나간건가 걱정 한가득하던 중.. 이성을 되찾고 수많은 유투브 비디오들을 찾아보고 가설을 기반으로 테스트를 이래저래 한 결과.. 속도가 20 MPH를 지나가면 나는구나 싶어서 더 테스트를 해본 결과 고속도로에서 60MPH를 지날때도 그럼을 발견하면서 OTL..
다시 정신 채리고 곰곰히 테스트해본결과 이건 속도가 아니라 엔진 RPM이 2000-2500구간에서 발생한다는걸 다시 확인 (그래서 60MPH 즈음에도 발생하는 거였음) 동네 카센타에 가져가서 물어본 결과 방열판이 오래되고 느슨+유격이 생기면 엔진의 떨림이 방열판/커버에 전달되면서 소음이 발생하는걸로 결론을 내리고… 용접을 하면 시간과 돈이 많이 드니 그냥 고정시켜주는 나사 하나 끼워주는걸로 해결하고 왔다..:)
허나 일주일후 다시 소음 발생.. 아마도 그 고정나사가 빠졌겠다 싶어서 더 안정적인 솔루션을 탐색하기 시작한 결과… 느슨해진 방열판 주위를 쇠로 만든 clamp로 감아주면 된다는 비디오를 믿어보기로 하고…차 밑에 기어들어갈 수 있는 ramp도 주문해서 clamp와 도착하길 기다리길 몇일… 결국 ramp와 clamp가 같이 와서 밑으로 등포복(군대도 안간 난 고등학교 교련시간 이후론 처음..ㅎㅎ) 을 하면서 기어들어가 그때 박은 나사가 빠져있음을 확인하고 clamp를 낑낑거리며 감았다.. (등대고 누워서 손들고 벌서는 구조로30분..ㅎㅎㅎ)
하필 자꾸 먼지덩어리들이 떨어져 오른쪽 눈에 들어가 개고생을 했지만 결국 clamp2개 달아주고 테스트 결과…조용…. 눈물이 주르륵 흐른다.. (특히, 먼지 들어간 오른쪽 눈…ㅠ.ㅜ)
The neighborhood we lived since last Summer has closer access to Indian restaurants and stores.
Still extremely confusing with its name, there is a pizza shop called CanAm Pizza- which actually specializes in Indian pizza 🙂 (I thought it would have more meat menus as it is CanAm .. :))
After testing with general Peperoni pizza last time, this time went to one of their specialties – interesting taste 🙂 – felt like to say “this must be close to the street pizza in Delhi” but I have never been to India :D….
아무래도 벨뷰-레드몬드 경계 근처의 벨뷰에 살다보니 동네에 확실히 인도사람도 많고 인도가게들도 많다.. 근데 매번 출퇴근하면서 항상 지나오던 CanAm Pizza란 가게가 있다 (심지어 가게 로고도 홍단풍 깃발과 성조기가 같이 그려져 있는데…) 실상은 인도 피자가게다..ㅎㅎ
지난번에 기본적인 맛이 궁금해서 그냥 페페로니만 한번 시켜먹었었는데 이번엔 아예 인도피자도 하나 시켜봤다..ㅎㅎ 이름하여 탄두리 피자.. (뭐 한국도 불고기, 고구마, 감자 피자가 있으니..ㅎㅎ) 버터치킨피자와 끝까지 고민하다 탄두리로..ㅎㅎ
뭐 아무래도 specialty피자이다 보니 내용물이 보통피자에 비해 아주 실하다… 당연하지만 탄두리 치킨에 들어가는 향신료도 약간 들어가있고.. 슬쩍 매콤한 부위도 있고..ㅎㅎ 마치 델리 어딘가에서 먹는 피자라고 말하고 싶지만 인도를 가본적이 없다..ㅎㅎㅎ
암튼 오랜만에 평소에 먹어보지 못한 재미있는 피자 한번 먹어봤다. 이름은 캔앰이겄만 가게 TV엔 Cricket 중계가 특어져 있고.. 피자 픽업 기다리는 대략 10몇명의 사람+직원 중 비인도인은 나하나.. (모두가 ‘이 shake it은 뭐야..?’ 하고날 째려보는 분위기..ㅎㅎㅎ) 여긴 어디인가..ㅎㅎ
우연히 진짜 아무 이유없이 문방구 불량식품이 땡겼다..그래서 아마존을 뒤진 결과 역시 쫀드기를 파는 데도 있음.. 아마존의 무서움과 뭐든 팔아보려하는 한국 쎌러의 무서움을 동시에..ㅎㅎ
This was my street snack – usually you buy this at stationary shop near elementary school – in Seoul when I was a kid – still not clear what is made of but taste chewy, sweet and crusty after torching 🙂
이번엔 렌터카랜다…. 신차 생산 라인이 pandemic때문에 서고, 차량용 반도체 공급도 원활하지 못한 관계로 중고차 값이 계속 올라가는 기행인데.. (내 똥차들도 작년부터 감평가가 한달에 몇십불씩 계속 올라간다..ㅎㅎㅎ) 항공 여행 수요도 급감한 김에 차가 가장 큰 비용인 렌트카 회사들이 가지고 있던 차를 가격이 올라간 중고 시장으로 많이 밀어냈고…특히 렌트카 회사들이 많이 사가는 보급/중소형 신차는 (마진이 낮은 관계로 제작사들의 생산에서도 우선순위가 떨어지고..) 여행수요가 bounce back해서 구하려고 해도 이제는 못 구하는 사태가 발생…
어떤 동네는 (주로 몬타나나 하와이 같이 다른곳에서 떨어진 곳) 아예 U-Haul트럭까지 빌려서 간다고한다// 이 사태는 최소 1년은 더 갈거라고 한다.. 참나…
회사 동료가 하와이 여행 계획 다잡고 마지막으로 렌트카 예약하려다 하루에 $300이어도 못찾는다고해서 다 취소하고 여행 목적지를 바꾸는걸보고 허허 했는데 이런 경우가 파다하다고 한다..
작년 초에 중국에서 생산이 안된다고 PC가 구하기 힘들어진 걸 시작으로 사재기로 인한 휴지/쌀/wipe 부족, 가공육 프로세싱장 집단감염으로 고기부족, 집에서 갇혀지내는 사람들이 많아서 집고치는 인구가 많아지며 목재가 딸리기 시작하고 또 뭐가 딸리기 시작하고 등등 shortage의 끝이 없고 물가는 계속 올라간다..ㅎㅎㅎ
Now it is rental car – as rental car companies sold their inventory to used car market which has been appreciating values & limited new car inventory with production backlog and semiconductor shortage. Ha….now let me think what the next one will be..
Great documentary on Black Pink which has been one of the most global scale breakthrough k-pop production after BTS. Kind of agree on success – perfect team, and producers- but somewhat painful to watch 😦
그래도 수많은 k-pop 걸그룹중 그나마 제일 전세계적으로 성공한 블랙핑크를 조명한 다큐.. 눈물겨운 노력과 적절한 팀구성 및 Teddy-테디는 원타임때부터 최고였긴했다..ㅎㅎㅎ-를 메인 producer로 넣은 성공공식이다… 한편 이런 대형 기획 그룹을 보면서 느끼는 건 눈물겨운 경쟁과 노력 그리고 한편 모두들 같은 방식의 춤과 노래.. 결국 가수가 되는것도 자본주의구나란 서글픈 생각도 나는 동시에 정말 특이한 음색에 노래잘하는 사람이 기타메달고 짜잔하고 가수로 데뷰하는건 정말 보기힘들것 같다는 생각..
누군가 그랬다… 엔지니어링 또한 문제 해결을 위한거라고… 비전공자로서 그럴수도 있겠네 했는데…제대로 체험삶의 현장(?); 나같은 어정쩡한 문송인에게 세상은 점점 어려워진다..
작년에 복잡다단한 이유로 시원하던 집 놔두고 동네의 타운하우스에 이사를 왔건만… 첫 여름을 지나면서 아무래도 타운하우스는 좀 덥지 않을까 싶었는데.. 하필 옆집이 에어콘을 설치한 집인데 실외기를 이쪽 집 문가에 설치해주는 만행을 저질러 주셔서… 정말 더울때 문을 열어도 옆집 열기까지 더해져서 더 더워지는 참사가 계속 되었다… 결국, 이 집에 1년더 살기로 하고 여름에 킬 포터블 에어콘을 주문했다..
근데, 에어콘을 보니 이나라에서 파는 포터블 에어콘은 다 위-아래 창문에 한켠을 막아서 공기를 내뿜는 구조의 공기배출 시스템이건만, 하필 이집에는 거실에 위아래 창문이 하나도 없고 미닫이 문만 있는구조..ㅎㅎㅎ Youtube로 여러 연구 결과 (벽에 구멍을 내고 밖으로 빼내는 옵션도 있으나 여긴 우리집이 아니기에 pass, 즉, 철이 지나면 쉽게 철거가 되고 티를 내지 않는 해결안이 필요) 결국 수직상황에 적용할수 있다고 하는 제품 kit를 아마존에서 주문했다.. 허나 kit을 배송받고 보니 문제는 1) LG가 배출구가 표준이 아니고.. 2) 수직에할수 있다지만 미닫이 창에 최적화되어 있어 이걸 문에 적용하자니 주욱주욱 늘어트려야해서 너덜너덜하고 안정성 제로..
아쒸… 결국 1)은 PVC를 깍아 해결하고 (도데체 kit는 뭔 역할인가 싶고.. 내가 “생쌀을 재촉한다고 밥이되냐”고 외치던 방망이 깍던 노인인가 싶음..) 2)는 비슷한 문제로 어떤 Youtuber도 참다 못해 frame을 완전히 나무로 짜버리고 kit을 나무에 끼운걸 만드는 걸 보고 아이디어 참조하여 미닫이 문 홈에 딱맞는 2×2목재를 사와 일종의 외벽 고정하면 되겠다 생각해주심.. 결국 2×2사와 높이에 맞게 잘라 홈도 파고 문을 닫을때 접촉하는 한쪽면을 덧댔는데 여전히 이넘의 kit는 춤을 춘다. 자세히 보니 결국 문 끝 안 쪽홈에 lock장치로 튀어나온 부분이 있어 kit가 안정적으로 수직 고정이 되지 않아 춤을 추는듯…
결국 2×2 목재를 하나더 사오고 kit다른 쪽에도 목재를 받힘해주고 결국은 kit옆면에 구멍내고 screw로 고정해주니… 드디어 고정체로서 안정성을 확보했다.. 허나 목재가 살짝 비틀어져있어 문을 닫으니 문과 목재사이에 gap이 있고 여전히 kit와 목재 사이도 어쩔수 없이 gap이 있었다..
이 비싼 찬공기를 희석시킬수 없다는 생각에 결국 바람막이 고무 붙이기도 동원하고 문 바깥쪽에는 나무를 하나 덧대서 목재와 문사이의 gap도 해결하고 kit중간중간에 보이는 공간도 다 막았다.. 그리고 한동안 lock을 할 수 없으니 방범용으로 문사이에 낄 나무도 잘라서 손잡이 달아주고..ㅎㅎ
근데, 다했다를 외치려한 순간 다시 보니 문이 완전히 닫히지 않는 관계로 고정된 문과 vent때문에 완전히 닫히지 않는 문의 frame과 frame 사이로 공기가 술술 잘통하고 있는걸 발견하고 여기도 바람막이 고무를 동원하여 드디어 성공…T_T
이번 여름은 시원하게 날란다.. (아니 내 골방/cave는 어차피 시원하니.. 가족들이 덥다고 하는 성화가 없어지기를..ㅎㅎ) 역시 홈디포와 아마존이 승리..
이제는 저 나무를 이제 하얗게 칠해야 하나 아님 그냥 눠둘까 고민중이시다..ㅎㅎㅎ
One thing encountered after moving in current place in last summer was this place is hot in Summer 🙂 – Part of it driven by Townhouse structure and also next door neighbor’s air conditioner vent was installed right next to the siding door of our place; hence opening the window/siding door never helped or even made worse in hot summer days.
After long thoughts and landing a plan to stay at this place for one more year, purchased expensive LG portable Air Conditioner. Now, the problem is how and where to install the vent, and making it worse, this home doesn’t have a horizontal or up-and-down windows, leaving the only option as installing the vent at siding door. (plus as a rental house had the solution shouldn’t impact the main structure of the house and should be easy to remove when season is over)
As all the portable air conditioner assumes up and down windows, had to find the solution to have vent at tall siding door, but luckily found there is something at Amazon for this.
However, this was not sturdy enough (PVC) or very loosely standing – likely because this is optimized for siding window – not turning out to be a long lasting option (had to do adjustments almost every time we turn the conditioner on) and also the default vent didn’t fit with LG’s outlet.
So had to take several actions
– Hand cut the vent to fit the LG outlet with knife and hand saw
– Buy and cut the 2×2 lumber and cut + make a rabbit cut at the bottom to fit into the door’s rail
Then forced to snug the vent kit between the door and inserted wood – but kit was still unstable as the door’s lock installed at the end of door wasn’t providing angled & straight support to the kit.
So bought one more 2×2 had it as a place holder at the door’s end and inserted the vent kit between 2x2s; worked well but vent kit was still dancing around and had tons of gaps to let air flow in various locations, and – as expected- 2×2 not being straight/square also generated sizable gaps between door and 2×2 when closed.
To solve these next set of troubles, drilled between the kit and 2×2 and screwed it to make it sturdy; adding one more layer of wood at outside to close the gap between door and 2×2, + applying weather stripping to seal the gap around the vent kit and 2×2 and also applied the weather stripes on inner frame gap (between the moving door and fixed door), and also cutting the 2×2 for security lumber as the lock will not work during the times we have this vent. 🙂
Although not having ever been an engineer, reminded me engineering is all about problem solving 🙂
Now the question is – shall I paint the woods to white to match or not 🙂
가격이 커피결정에 중요한 요소이긴한데…ㅎㅎㅎ 얼마전부터 구지 고를 수 있으면 중남미 이외의 커피를 찾아보는중… 일단 기름이 덜해서 좋고… (기름기가 덜하니 Espresso Machine에도 좋을거고…) 지난 여행에서 오는길에 coffee를 못사워서 아쉬웠던 Portland산이니 그것도 makeup할겸 겸사겸사..
이 커피는 회사에서 일년에 한번 장시간에 걸쳐 하는 내년도 사업계획 발표하는 ‘온라인’ 행사에 간식을 제공해준다고 간식 잔득 파는 사이트에 주문할수 있는 쿠폰을 보내주셔서 뭐 같지도 않은 요상한 유기농 과자들 가격만 비싼거 같아서 과자는 안사고 커피를 샀다..ㅎㅎㅎ – remote시대에 새로운 비지니스 모델들이 참 많아졌다..
Happen to pick this up from online corp event snack site- Now there are lots of new business model with all remote world…
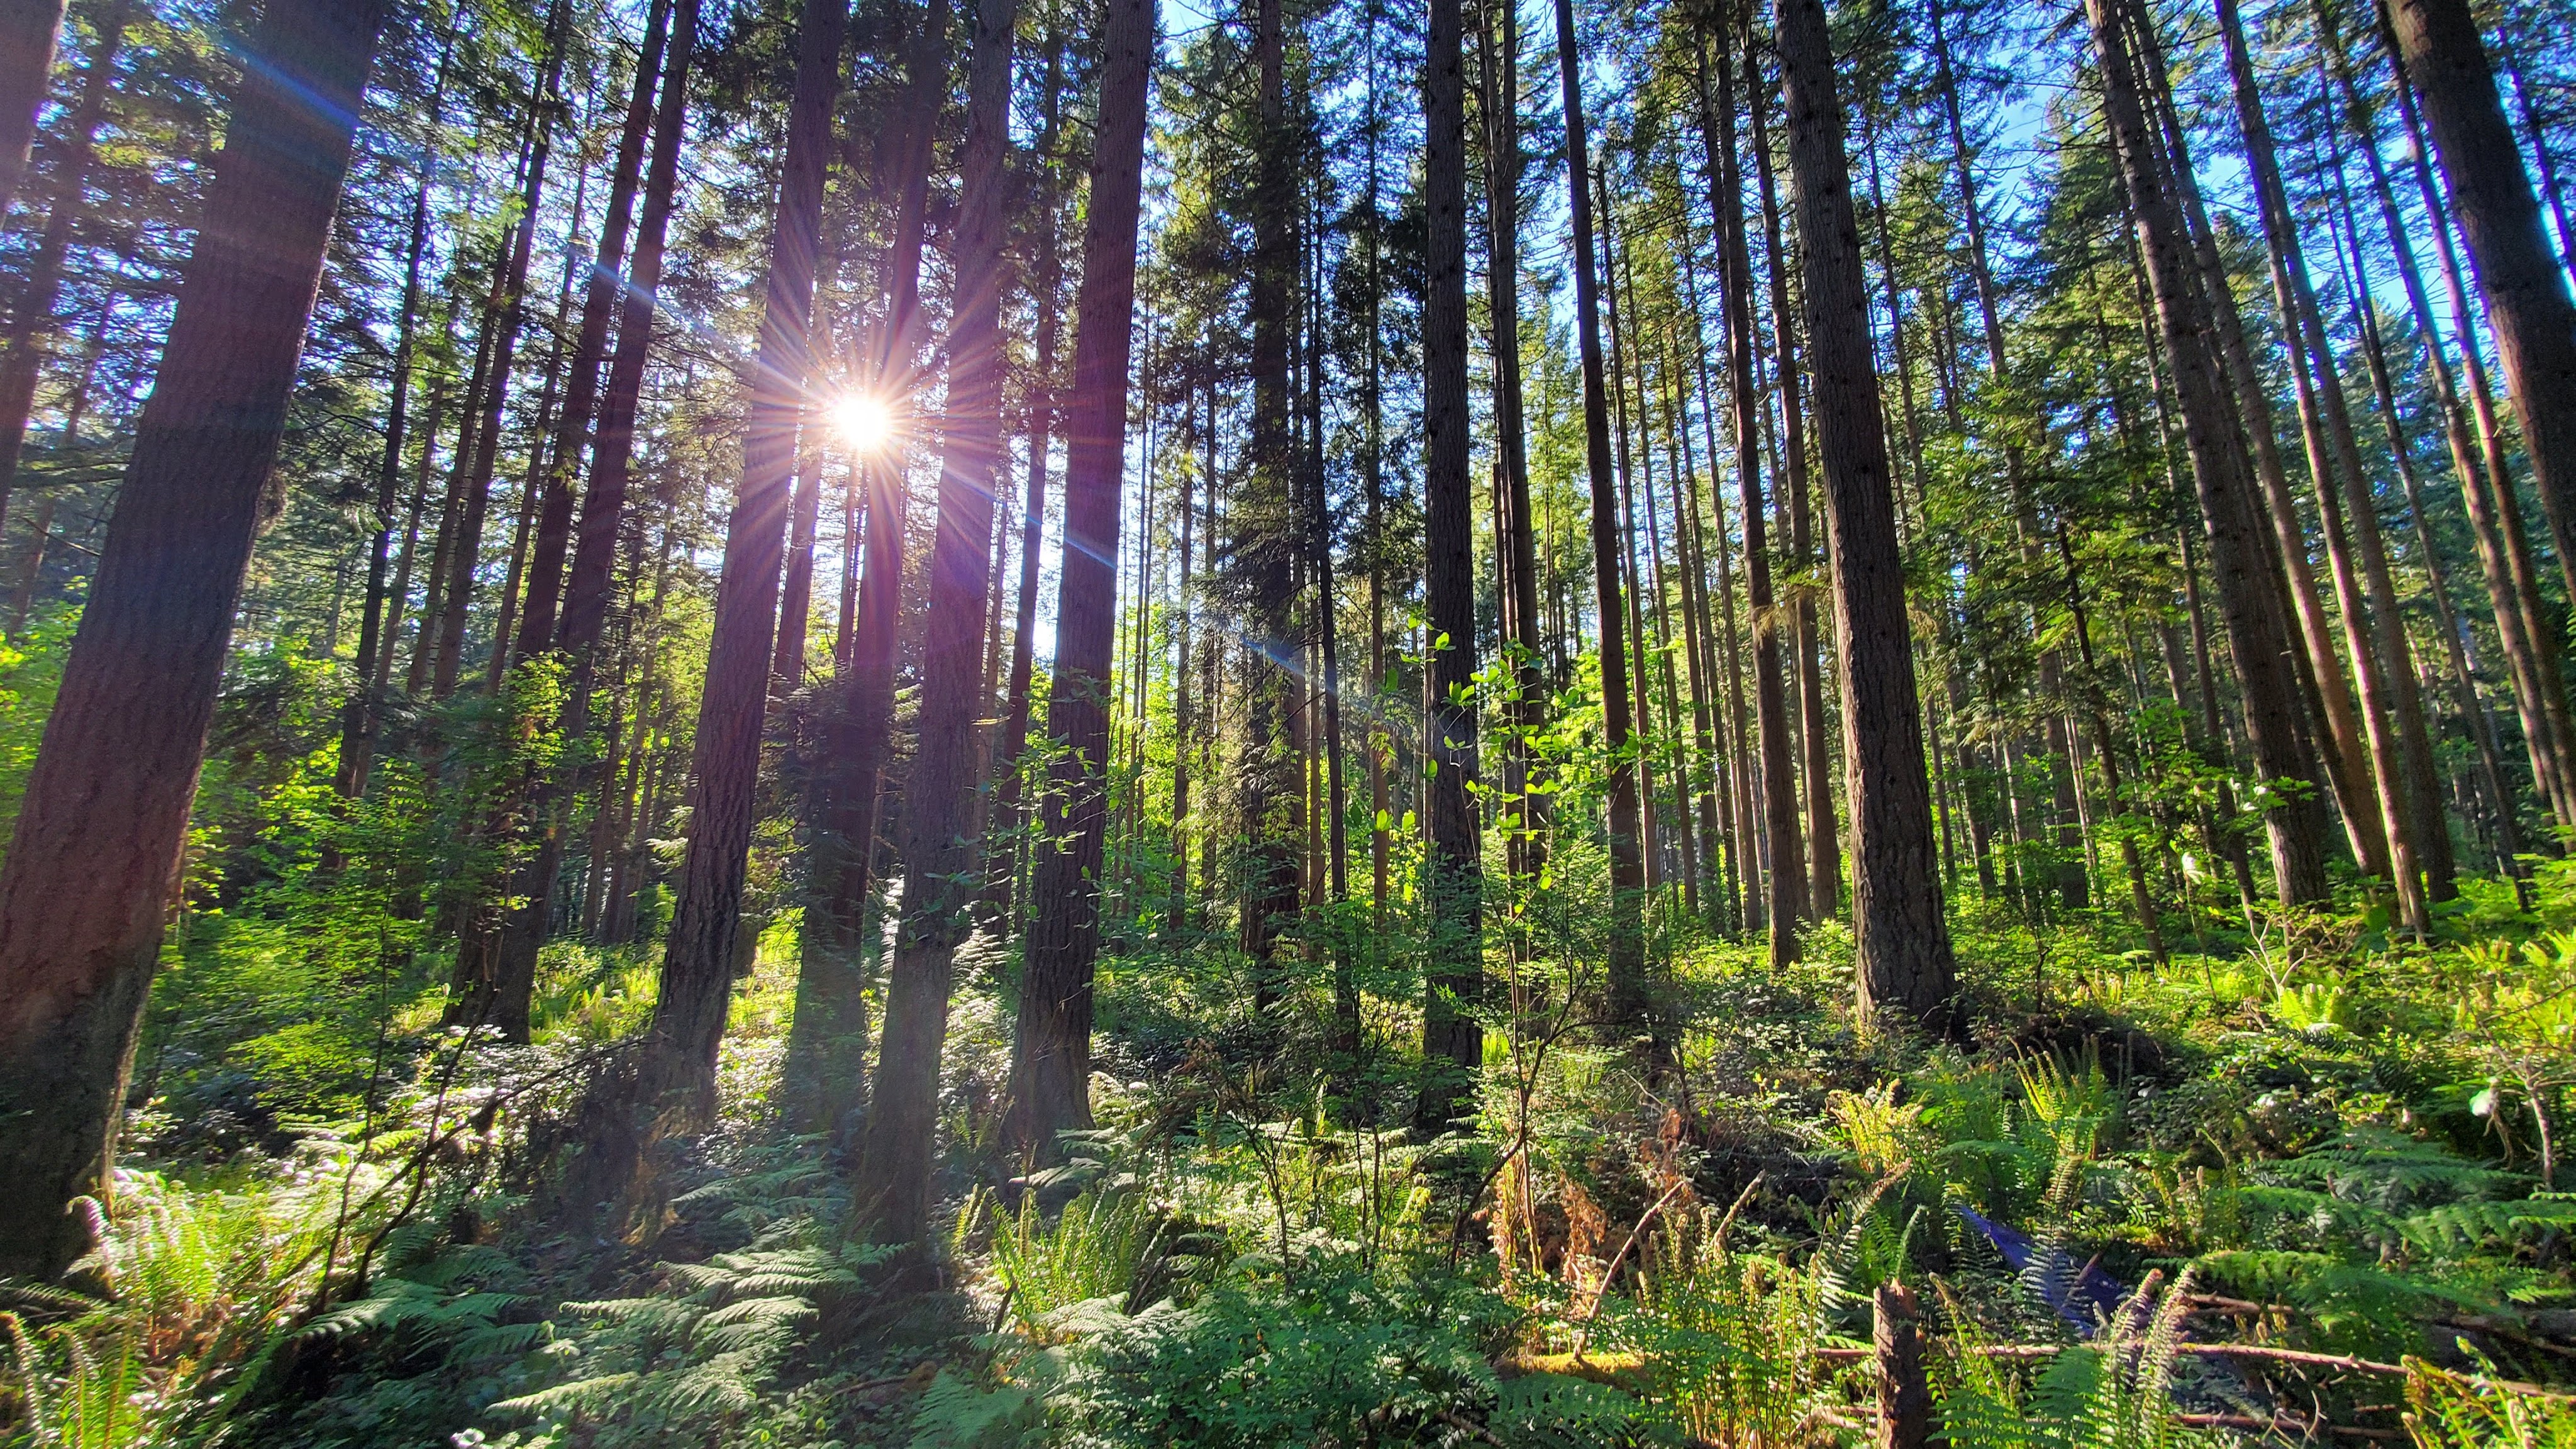
A block or so area between Bellevue & Kirkland – Always passed by the other side of the road and maybe encountered several ‘ranches’ having horse barn and wondered where do they ride the horse. Now I know after trailing with extreme care of brown things left by horses.. :)..
벨뷰와 커클랜드 사이에 있는 두블락 즘 되는 공원 Trail – 주립공원인줄 몰랐네..ㅎㅎ 항상 입구 반대편의 벨뷰 시립 골프장 쪽 목장형 저택들만 보며 지나가다가 입구에 와본건 처음… 뭐 와서보니 사실 승마 시설이 엄청나서 승마공원급 수준.. Trail이 넓고 자연이 잘 보관되어 있어 좋긴한데 Trail이 넓은건 말들이 뛰다니기 위해서이고.. 곳곳에 말똥이 널려 마냥 편하게만은 못다님…ㅎㅎ